The 72 Frolic Bathroom Remodel Is Nearing Completion!

Today I told my husband that I had been thinking back to that day last May when I had him pull the “72” Frolic Camper, now known as the Pink Paradise, out of the weeds.  You remember that day – right?  It was the day that I seriously questioned my sanity.  He admits he clearly remembers.

I suppose that what I never confessed to anyone was the pang of guilt that washed over me as I looked at this poor neglected camper and thought (for a minute, or thirty plus) about abandoning it. 

The thing is, I couldn’t stop thinking about this little camper’s past.  I was certain it had once seen it’s share of  fun and adventures.  I was also certain it provided a lot of good times and lasting memories to it’s former owner’s.  And here I was selling it short, just because it was filthy, rodent infested, and in need of some serious repairs.  Guilt is a powerful thing!

From that point forward it was full steam ahead, but don’t get me wrong, it hasn’t been easy.  There have definitely been many more hours and dollars spent on the Paradise than what I had originally planned.   And there were days that we had to think, and  rethink our remodeling options.  Now that the inside of the Frolic is nearly finished we are beginning to think ahead to what needs to be done to the outside.  I’ve ordered new tires for her (I’ve decided she is a she) but she still needs new fenders, an awning, and a shiny new paint job.  More work, yes.  More money, yes.  Lingering guilt, no.  Still questioning my sanity, umm – yes.

The bathroom has proven to be the most time consuming part of the entire project.  It needed to be completely torn out out due to rodent and water damage.   This meant it needed new studs, insulation, wall and ceiling coverings, a counter and sink base, plumbing (drains, water lines, and faucets) and electric.

I haven’t posted much about the bathroom remodel because progress was slow and tedious.  Now, that it’s finally starting to look like a bathroom I thought I’d let you have a peek.

The two pictures above are of the bathroom BEFORE we tore everything out. 

The wall and ceiling were soft and spongy.  After we removed the paper (above) you can see why.

Here is a picture of the bathroom being (carefully) torn apart so we could reuse the original shower insert, toilet, and stainless steel sink.

This is the shower insert and the holding tank that sat under the toilet that we had to remove to work in there. 

Above is a picture of the bathroom floor and walls after the tank and shower insert were taken out.

This picture above shows the new insulation we installed. 

We installed Luan plywood on the exterior wall.  We will be finishing it off with tongue and groove cedar.  The cedar was hubby’s idea.  I was sold on it because It will withstand moisture and it  looks nice.

The insulation in the ceiling was installed after each cedar board was secured.

Hubby made a new counter using the old one as a template.  I landed a remnant of white Formica at Lowes for dirt cheap.  There is white (washable) wall board below the counter and behind the toilet.  Here the sink and the holding tank have been reinstalled.

I opted for wainscoting (that I painted pink) on the inside wall of the bathroom.

I applied Danish oil to the cedar to provide a water resistant finish.  The light fixture was a reuse from our house and it saved us from having to buy one.

Yes, we have water!

The original toilet has been reinstalled. And yes, it works! Notice the nice and neat plumbing job hubby did?

The old shower floor insert was in need of repair just as you walk into the bathroom. Hubby fixed it with fiberglass and Bondo – it looks great now. I spray painted the insert with a sand paint by Rust-Oleum. This covers the old discolored floor and also provides an anti-slip surface. I will put one final coat on the floor once we are completely done installing the cedar, the base cabinet for the sink, the shower faucet, curtain rod, and trim work.

And there you have it, a glimpse at the Pink Paradise’s (almost finished) bathroom. 

Stay tuned because I will be sharing more updates as we progress.

Vintage Camper Re-Plumbing–Not A Job For The Faint Hearted

The Frolic, also now known as the Pink Paradise, has had some serious plumbing issues. While much of the work is still being completed I thought I’d share an update.

Since a few of the exposed PVC pipes and copper lines showed obvious damage, we decided to remove the shower insert to get a better look underneath.

This was a good move on our part since we found the lines under it in need of replacement as well.

Here are some signs of the damage, and here are some before and after shots of the shower insert.

frolic plumbing 006

frolic plumbing 007

bathroom demolition 011

frolic plumbing 004

To work on the water lines, check the pump, and remove the fresh water tank (to clean it and check for leaks) we had to remove the table, along with the recently upholstered cushions. I felt like we were moving backwards instead of forward.

frolic plumbing 025

The 12 volt operated water pump (below) looks ancient, but the good news; it still runs!

frolic plumbing 008

While working under the seat we found carpenter ants that weren’t very eager to vacate the camper.  Here is an example of the damage the can cause.

frolic plumbing 040

Here is how we evicted them.  It took 2 foggers to do the job.

frolic plumbing 021

Below, we have replaced the ant infested wood, cleaned what was a terribly dirty and looked almost unsalvageable fresh water tank, and started running new water line. 

frolic plumbing update 016

We found the kitchen sink faucet was filled with a mud wasp nest so we replaced that too.

frolic plumbing 018

And here is proof of our progress.
frolic plumbing update 018

frolic plumbing update 024

frolic plumbing update 015

What’s next?  We still have to check the gas lines for safety reasons, ensure the hot water heater works, and check out the furnace too.  We need to  finish the bathroom plumbing, track down a water leak (when it rains) that we noticed in the bathroom, and hopefully after we get those things out of the way we can start rebuilding the bathroom. 

I have been working on the curtains for the Paradise.  I think you’re going to like them, but that’s a story for another day. 

So, are you ready to buy a vintage camper to re-do?  Or, do you want to hire us to do it for you?

To follow the Pink Paradise project from the beginning, and see all the updates along the way, type Pink Paradise into my blog’s search engine.  You’ll be able to read each post featuring the Paradise.

Vintage Camper – Pink Paradise – Update #3

I’ve been updating you on our progress in the Frolic – AKA – the Pink Paradise, and it may not look like we’ve made huge strides since my last posting, but believe me, we have.  There are so many small details that we’ve tended to.

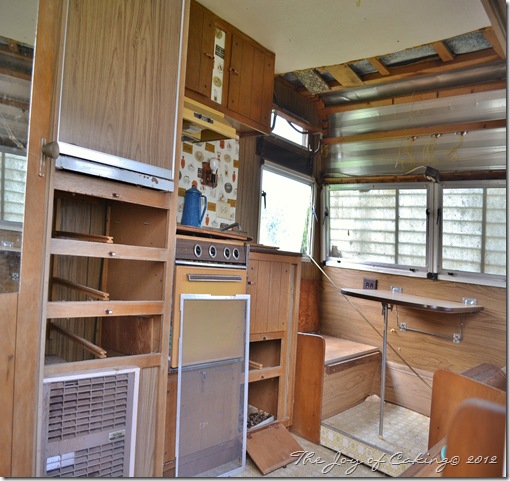
A reminder of what the Frolic looked like before.

frolic 002

Frolic – main living space nearly done.

cocktails and camper 013

New covered seats and lot’s of new trim work.  I picked up two awesome rag rugs for a dollar each at the dollar store.  They fit in perfectly!

cocktails and camper 020

If you’ve been following along, then you know that when I decided to start remodeling our vintage Frolic camper I had my work cut out for me.  I wanted to salvage as much of the original camper as I could, while sprucing her up with a bit of my own style.  I think I’ve done a fairly good job at both.

Instead of ripping out and replacing appliances, dark cabinets, the table and booths,  and the counter top, I have managed to work with them, and around them. 

Part of the ceiling that had already been torn out prior to starting this project left us no choice but to replace it .  Opting for the wainscoting added a touch of my tastes.  And using scraps of building materials we had on hand has helped immensely with remodeling costs. 

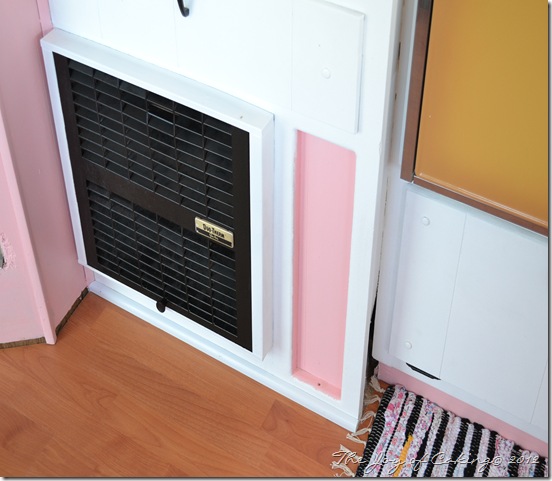
There has been a lot of trim work to contend with.  And lot’s of  other not so obvious details – for example,  the installation of several new (white) light switch/outlet covers to replace the originals that were dark brown, painting the table leg, cabinet hardware,  heater cover, and outside edge of the fridge – just to name a few.

I still have some decisions to make concerning the interior lights.  And I still have to decide on what to build to hide the ugly wheel well.  A good neighbor will be helping me make the curtains this week or next, and of course the decorating is yet to be done. 

I just started working in the bathroom which has been on my remodel list.  I’ve found some water damage on one wall and the wall will need to be torn out and rebuilt.  We have also moved outside to start some roof coating too.

My dollar store gingham wallpaper helps tie in the gold vintage stove/oven.

cocktails and camper 025

The heater before painting.

frolic 022

The heater after painting – more trim work still needed on the wall to the left.

cocktails and camper 039

Other side of the camper (upper) – before painting.

frolic - sunday 006

Other side of the camper (upper) – after painting.  The gas light has to be reinstalled in the center of the cabinet but some gas line work has to be done first.

cocktails and camper 032

This was the clothes/storage closet – before modification.

baby chicks and frolic 030

This will now serve as our TV/storage center – after modification.

new frolic photos 002

My handsome man helping patch the roof.

new frolic photos 022

We were  honored to receive an invitation to a vintage camper rally in Vermont this month from Mariah of The Comet Camper.  Mariah is a girl after my own heart.  She’s redoing an old camper and she’s incorporating a lot green technology into her project .   She wants The Comet to be off the grid. Go check it out!

As for the invitation, unfortunately we had to decline because the Pink Paradise isn’t near ready.  But there is always next year!

I promise to continue to keep you updated on the Pink Paradise and I’m anxious to present a completely finished project to you.

So, are you a retro travel trailer kind of guy or gal?  Or do you prefer all the luxuries of modern-day campers?

If you missed my other posts on the Frolic – AKA – Pink Paradise, check them out here.  The posts below start from the beginning and take you up to most current work that has been done on the Paradise.

My Vintage Travel Trailer; The Beginning

The Pink Paradise – Update #1

Pink Paradise – Update #2

We’ve Finally Made Friends

Vintage Camper Re-Plumbing – Not for the Faint Hearted

Frolic Travel Trailer – Pink Paradise Update – 2013

Tips for Buying a Vintage Camper that Needs Renovating, and the Chandelier

The 72 Frolic Bathroom Remodel Is Nearing Completion!

Baby’s Got  A New Pair of Shoes! And…

Can’t get enough of these campers?  Check out all of vintage campers I photographed at the Finger Lakes Tin Can Tourist Rally last September.

If you’re looking for a customized glamper let’s talk!  And if you are looking for a parts (new & used) for your camper then check out Fletcher’s Vintage Trailer Sales. Please make sure to mention that you found them through my blog.

The Pink Paradise – Update #1

Real progress in the Pink Paradise.

When I started this project I consulted with a couple that sells vintage travel trailers in our area.  My big question to them was simple.  Do I keep the travel trailer original, or change it to something more my style.  There weren’t any nice birch cabinets to refinish in this trailer so their reply was; change it to something you like.  With that said, I have made some dramatic changes.  

The biggest challenge is working around the color of the original stove/oven.  I don’t want to replace it because it’s in excellent condition.  I think I’ve got this challenge all figured out, but only time will tell. 

So, are you ready for a sneak peek?

The bathroom before cleaning.  I found a live baby mouse cleaning this out – cute, but gross!

frolic 005

The bathroom after cleaning.  Ahh… Much better!

baby chicks and frolic 024

The major cleaning is done, and the persistent bees, mice and ants have been terminated, or have they?   And the bathroom is slated for a remodel just in case you’re wondering.

I had a nosey visitor stop by to check out my progress.  I think she was looking to see if I was planning on building a nesting box to accommodate her.

cupcakes and frolic 008

I removed a bulky plywood couch that took up entirely too much space in the trailer.  That will be replaced with some type of seating to cover the wheel well.  Still trying to decide exactly what.  Ideas?

No more bulky couch below.  Do you notice the pink paint?

cupcakes and frolic 011

I primed everything.  That was a time-consuming process since I decided to use a non-latex based primer and this type of primer does not apply quite as easily.  I also took all of the cabinet doors off, along with their hardware.  I can tell you that working in such a small space didn’t help speed things along either.

Remember the travel trailer before primer?

frolic 002

Look at the trailer after the primer, and with a touch of the pink paint.

cupcakes and frolic 010

Below, I have put the first coat of paint on the ceiling, walls, cabinets, and door latches.

frolic progress 006

Below is a picture of the start of the cherry laminate floor installation.  Hubby did the real carpentry work while I played carpenter’s helper. 

floor in frolic 003

And lastly, here is the finished floor. What a transformation!

peonies and frolic 036

There is still a lot more work to be done, but I’m really happy with the progress we’ve made.  I promise lots more surprises.

If you missed my first post about the Pink Paradise check it out here.


My Vintage Travel Trailer; The Beginning

With my flower beds all spruced up, freshly mulched, and looking like something out of an issue of Better Homes and Gardens magazine – okay, maybe I’m exaggerating just a little, I announced to my hubby that I needed a project.

Little did he know what I had in mind, or should I say in store.  In fact, I had been hashing this (not so) little project over in my head for quite awhile.

frolic 032

For years now, this little diamond in the rough has been sitting out back waiting for someone’s undivided attention.  That someone, as it turns out, is me.

I love just about anything vintage, retro, and antique, so when I started looking on-line and saw how people are re-doing vintage travel trailers and making them into the coolest, hippest, tiny spaces on wheels, of course I wanted in.

Armed with bee spray, a shop vacuum, and massive cleaning supplies, I dug in.  A couple of hours into the start of this project I wondered if I had suddenly, without any warning, become insane.  There’s always that chance you know. 

Apparently, the chipmunks, mice, bees and ants take vacations too because  I found chew holes in the walls and cabinets, along with mouse droppings and  black walnuts that had been stashed in every drawer and crevice. I even found an abandoned honey comb under a seat, and the ants still visit daily.

frolic 002

frolic 024

Since I’m not a fan of inexpensive dark wood paneling, which is pretty much what this whole travel trailer is made up of, I am painting  the inside of it, as well as the outside.   And my color of choice?  Hold on to your coffee cups, PINK!  Of course, out of consideration for my hubby I asked him if he’d mind the color pink and he (being the loving and supporting) husband that he always is, said “No, this is your project, you paint it any color you want.”  Hence, he has already come up for a name for her “Pink Paradise”.

My objective; beautify this relic on a shoestring budget, and use as much recycled material as I can come up with.  I’ve got a pretty good start on that  since I have some scraps of laminate flooring and lumber on hand.  I am going to use some wallpaper that I bought at a dollar store a few years ago and never  put to good use, and with  a few modifications I might be able to recycle some old curtains I’ve been storing for Lord only knows why. 

Follow along as I  take you on my journey of transforming this beast, into a beauty. 

Click here to see (lot’s of pictures) of our work in progress.   Also, at the bottom of this post are pingback links that you can follow to see our restoration work too.

And here she is close to finished!  

Mission nearly accomplished!

Still want to see more??  Click here to see the  Before & After – 1972 Frolic Camper Remodel – Bathroom Door or here to see Table for Two in The Pink Paradise.